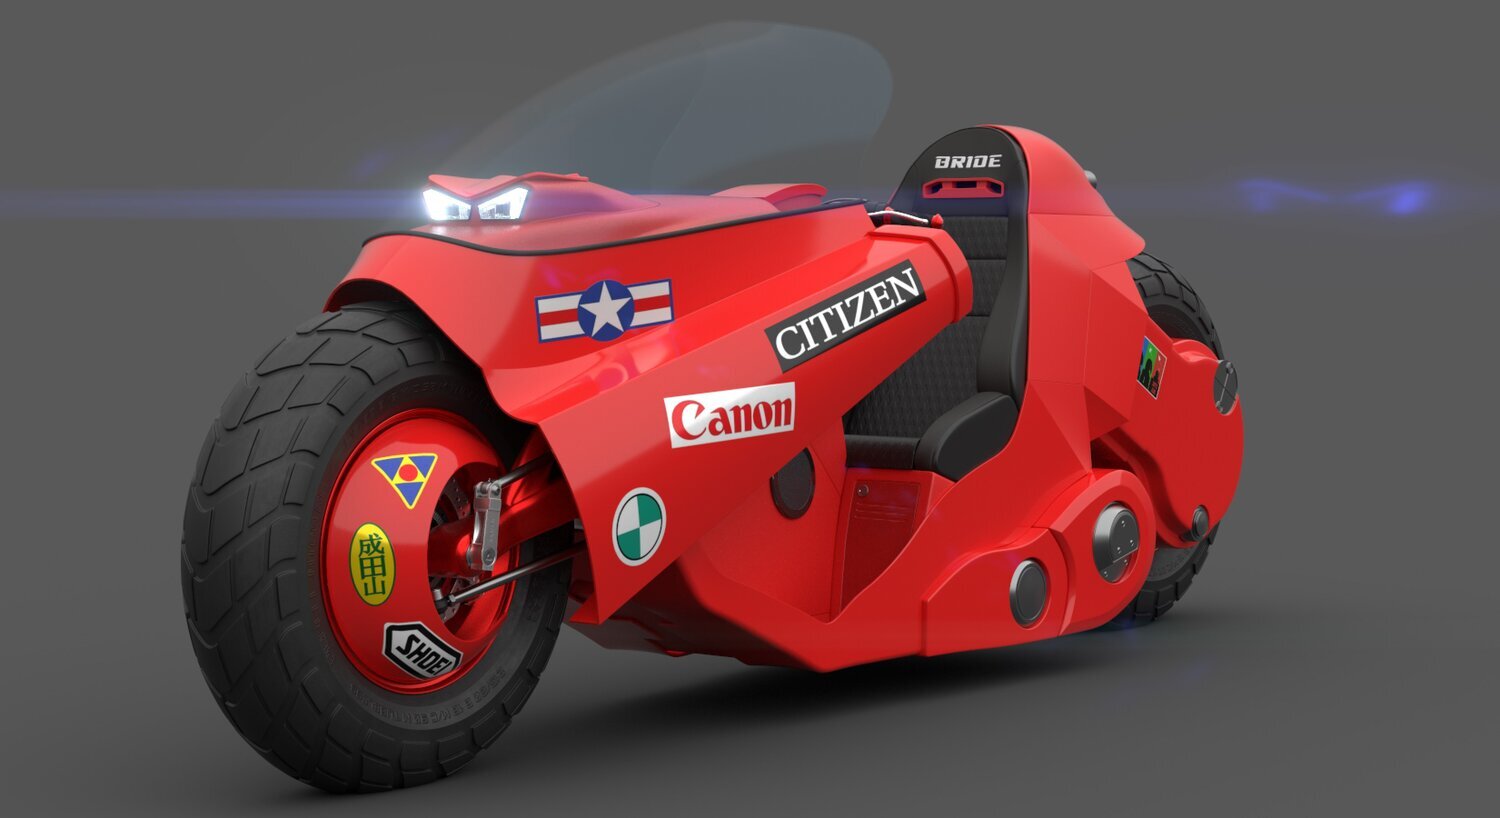
Behind the scenes for the curious and general updates
Final detailing and render (for now)
The great thing about substance painter is it’s not destructive so when I realised I just wasn’t getting the texel density I wanted and I wasn’t happy with the initial UV layout it’s no big deal to fix if you are clever how you go about it.
More detailing
Got the majority of the body done now, just dashboard to finish with all the little car icons (joy!)
Detailing on front suspension
Starting to come alive now, finalised textures on front suspension and body and added more detail and decals
Setup initial base materials
Still part of the “checking I’ve not missed anything major before I commit too much time to painting” I’ve gone around the model in substance painter and allocated some initial materials to make sure everything works as expected, all the masks etc. as sensible.
UV's and Mesh Tidy up
The first thing I do before getting deep into texturing is do a quick check to look for shading and UV issues, there are always some on the first pass. The model shading looked fine with mat cap when modelling but you can see as soon as there a real texture on it there are some issues.
UV Unwrapping
Well I won’t lie, this is always a bit of a slog but it’s done and I do quite enjoy it weirdly!
I’ve finalised all the meshes, removed any extraneous edge loops and back faces etc and generally tidied it up.
This is going to be highest level of detail, so I’ve got the mesh at a level where it’s visually acceptable at all but the closest viewing distance.
High poly model
I’ve worked around the rest of the model using the block out as a reference and creating a high poly version. In the main I’m doing subdivision modelling but I will be applying that at a level that’s visually acceptable as I unwrap and will tidy up extra edge loops etc as I go.
Front Suspension
After a lot of reading and some maths and creating a few test rigs I have decided that changing the front steering and suspension setup to centre hub steering is the way to go and would actually work in the real world nicely.
Blockout
First I create a really rough block out, no concern about topology just smash it together / Boolean etc. This is going to be to scale so I’ve also created a quick rigged character who is around Kaneda’s height and build. Just looking to get a feel for the main components and how it could work.
Modelling Kanedas Bike
I have always been a fan of Akira, and Kaneda’s bike is one of the most iconic.
The plan is using the cartoon and other sources as a reference reimagine the bike in high detail ready for animation keeping the aesthetics while making it mechanically viable and bringing it up to date.


